
 In this blog post we are going to look at creating indoor portraits using window light. This is a portrait photography technique that can work well for pictures of individuals or couples. For 2 people you will of course need a bigger window. It makes a good alternative to using lots of studio lights and is ideal when you are not able to work outdoors. Portraits using window light are often popular with wedding photographers, especially in venues with plenty of character.
As with any light source, the first thing to do is to look at how strong it is and what direction the light is shining. The distance of your subject from the window will affect how strong or soft the light is. Small movements of the head and/or body will change the lighting a lot. The advantage of window light over flash is that you can see immediately where the shadows will fall. Continuous lighting, whether natural or artificial, is useful for learning about how light sculpts the face (and body) for portraits. When practising, try lots of different angles with slight adjustments to body and head position. Also try moving your subject closer to and further away from the window to see how the light and shadows change.
It is important to get a feel for how light behaves and what shadows are created. Don’t just copy a pose you have seen elsewhere or use the same settings as other photographers. It is best to experiment and find out why some things work and others don’t. Also, it helps you to develop your own style.
You don’t need any extra equipment to start shooting indoor portraits using window light. It is possible to do this with just your camera. The monochrome image on the left of Sian was taken using just the available window light. You can see how it illuminates her face and where the shadows fall. From this you should be able to work out what angle the light was coming from. Using just one light source with the model very close to it produces quite a lot of contrast. If the light is too strong you may need to move your subject further away. Contrast is useful to help you see the contours of the face. It sculpts the face with the highlights and shadows. However, too much contrast can sometimes be a problem. The bright areas may be too bright and turn white or the dark areas may become completely black. Reduce contrast by moving them away from the light source. You could also try putting a thin sheet of material or paper over the window to soften the light. This effectively turns it into a large softbox. Obviously you will want to make sure you frame your photo to avoid getting that in or it will look messy.
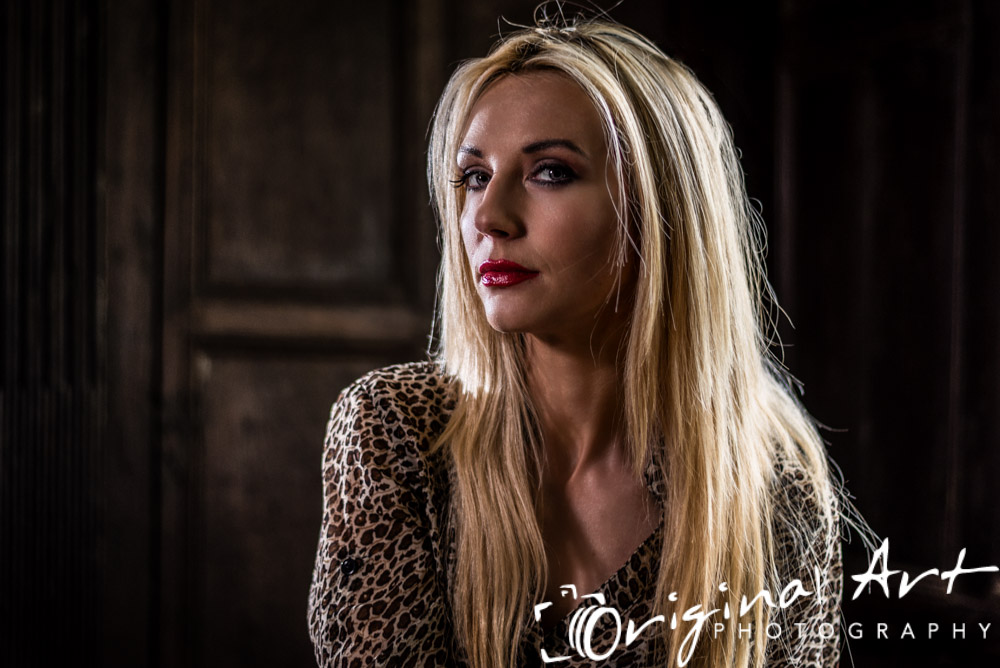
These next two images are taken next to a window using just the window light. As you can see, the light was quite strong and so there is a lot of contrast.


Our model, Ann-marie, is sitting right next to the window. It was a reasonably bright day outside so the light was fairly strong. The room is panelled with dark wood so does not reflect light back. We can see that the left side of Ann-marie is in strong shadow compared to the right side that is lit by the window light. Personally, I think that the portrait format image works reasonably well, but the landscape format (first of the two images) is not to my liking. For me there is just too much contrast there. We have a very bright window area, bright highlights on her hair and the majority of her face in shadow. The shadow is so dark that you can hardly see her eye. If this were a low key portrait with a dark background but similar lighting on the face then it might work. But, with the big contrast I think it is not successful.
When taking portraits using window light in this sort of situation, I like to bring in a second light source. The room is very dark because of the wood panelling, so it is hard to reduce contrast by moving the model. Instead, you have a few options. You can use a reflector – in which case you probably need an assistant to hold it or a specialised stand. Or, you could use continuous lighting (e.g. an LED light panel) or a flash (e.g. speedlight).
The next two images below were taken using a reflector, held by an assistant. This was the silver side of the reflector to bounce back as much light as possible. I prefer to use a large reflector to enable me to light not just the face, but also the body. The 3rd image shows an LED panel set up as a fill light. Continuous lighting is useful in this situation as you can see its effect immediately and you can balance the contrast quickly as much as you want to. I used a Yongnuo LED light panel. The black & white image on the right shows the effect of the fill light. I have balanced the exposure to reduce the contrast considerably. Her face is now much more evenly lit.
Indoor portraits using window light & a second light source:


We also shot some images further away from the window. I still used the LED panel as a fill light because of the contrast created by the room. This next portrait used window light to give a highlight to her hair on our right. Her face was lit by the Yongnuo LED panel. There was also a speedlight with a grid attached (to narrow the beam) which lit the left side of her hair as we look at her. It is important when mixing different types of lighting like this to check that you are getting consistent colours. You may find that in some situations you need to add coloured gels to help balance the light as some lights are a different colour temperature.
I hope this inspires you to try shooting some indoor portraits using window light. After all, it is a free light source! You can also use window light for still life photography, for example, not just for portraits. Remember that depending on the time of day and the weather and the size of your window you will get different light. Experiment as much as you can to find what you like best. Taking portraits using window light is certainly a useful fall-back if you are in a hurry and have no time to set up lights. Make sure you practise it before you need it!
© Joe Lenton, July 2015
If you are interested in learning more about indoor portraits using window light then book 1-2-1 tuition with Joe